Gating
Gating allows you to progressively filter your data to isolate specific cell populations. For example, you can select singlet cells based on scatter parameters, then select T cells, B cells and other immune cell populations based on expression of phenotyping markers.
Creating Gates
Howto
- Set your plot channels to the markers that you want to use for gating.
- Click one of the gate buttons above the plot: rectangle, polygon, ellipse, range, quadrant or split. (Range and split gates require setting the plot type to “histogram.”)
- Draw the gate on the plot.
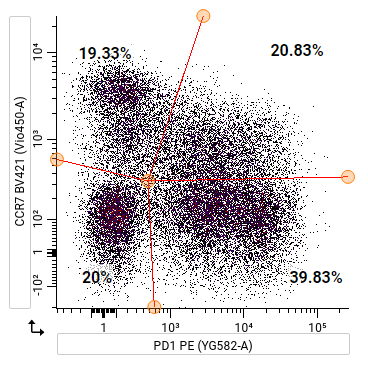
- Name the resulting population when prompted. The population will appear in the hierarchy.
- To view the events inside of the gate, double click the gate on the plot, or click the name of the gate in the population hierarchy.
Coloring plots by a third channel
Coloring a plot by a third channel can assist with gating.
Howto
- Change the Plot Type to Dot. A Color Channel option will be added to Plot Settings.
- Click on Color Channel and choose the channel to color the plot.
Tip
Coloring plots by a third channel can also be done when making illustrations.
Tailored Gates
By default, all FCS files in an experiment will use the same gate geometry. In some scenarios, you may want to adjust a gate to a specific file or set of files. For example, if your experiment includes samples collected on different days or from multiple donors, your gates on the scatter channels may need to be adjusted.
Warning
Generally, avoid tailoring a gate when statistics from that gate are used for comparisons between files. For example, if you are comparing the median fluorescent intensity of pSTAT5 in a population between two files, you should use the same gate geometry for both files.
Creating tailored gates
Howto
- Select a gate to tailor.
- Click the tailored per file switch to enable tailoring.
- Adjust the gate as necessary.
Note
A tailored version of a gate is only created for an FCS file when a gate is first moved after enabling tailoring. Thus, any files for which you have not adjusted the gate since you enabled tailoring will continue to use the default gate.
Applying tailored gates to other files
After you have tailored a gate to a file, oftentimes you will want to use that same tailored gate geometry for other files. For example, you may want to use your viability gate for all files from the same donor. You can apply tailoring using either file annotations or filenames.
Howto
- Select the FCS file and gate from which you want to copy the gate geometry.
- Click the apply tailoring to… button.
- Either manually select files from the list; or select annotation criteria to match, select the matching mode (any or all) and click select. You can view the selected files and refine the selection in the file list.
- Click apply. A message will be displayed indicating to how many files the gate was applied.
Auto-tailoring gates
Info
Automatic gate tailoring is available as an add-on feature. Contact support@cellengine.com for more information.
Gates can be automatically tailored using a machine learning algorithm that adjusts gates based on a subset of files that have been manually tailored.
Howto
- Manually tailor gates for a selection of reference FCS files. These files must be representative of the staining patterns that appear in the other files. See tips for best results.
- If the reference FCS files are in a different experiment, open the gating page in the experiment you want to auto-tailor.
- Select the gates to auto-tailor in the hierarchy. Use shift-click or -click to select multiple gates.
- Click on the Auto-tailor button in the left panel. A dialog will open.
- If the reference files are in a different experiment:
- Click on the dropdown under Source Experiment and select that experiment.
- In the Population Mapping section, reassign any blank or incorrect populations. Auto-tailored gates need to have the same gate type in both experiments (e.g. rectangular or polygonal).
- In the Channel Mapping section, click on any blanks that have a red underline or any incorrectly mapped channels that are used by the mapped populations, and assign each to the appropriate corresponding channel.
- In the Tailoring section, under reference files, select the files that you manually tailored.
- Under target files, select the files to which you want to automatically tailor gates.
- Adjust settings as desired:
- Minimum improvement is the minimum improvement in the gate position that must be achieved for the gate to be moved. This setting prevents tiny (potentially imperceptible) adjustments from being made to gates.
- Minimum events is the minimum number of cells that the reference and group of target files must have in the parent population for full adjustment of gates to be performed. If the files have fewer events than this, then only limited adjustment will be performed. This avoids incorrect positioning of gates when there are too few events to reliably determine where a gate should be placed.
- Smoothing variance is the degree of smoothing applied to the data when adjusting the gate. Optimal values reduce artifactual adjustments and improve gate tailoring by incorporating a larger region of information around gate edges.
-
Optionally, select annotations to tailor by. Files with the same value for the selected annotation(s) will be tailored together and all have the same resulting gate geometry.
For example, to have the same tailoring for all files from the same donor, select “donor.” To have the same tailoring for all files from the same donor and timepoint, select “donor” and timepoint.”
-
Click the tailor button.
Tips for best results
Auto-tailoring uses machine learning to gate based on how the reference files were gated. This has two critical implications:
-
The reference files must be representative of the staining patterns that appear in the other files. For example, if your experiment includes both healthy and disease samples, and the disease samples include malignant cells that are positive for some marker, you must manually tailor gates to files with staining patterns representative of both healthy and disease samples.
-
The reference gating must be high quality. Take an extra moment to ensure that the reference gate boundaries are nicely positioned. If they are poorly positioned, then the auto-tailored gates will also be poorly positioned.
Polygon gates provide more flexibility in terms of adapting to changing population shapes than other gate types such as rectangles. You can convert rectangle gates to polygon gates before using the tool if desired.
After using the auto-tailoring tool, pivot tables can be used to quickly inspect the results. If you find a gate that is not positioned well, right-click on the plot and select view in gating and adjust the gate.
If you notice a consistent pattern of gates being mis-positioned (for example, if you notice that a gate is consistently cutting through a population), review the reference file gating and/or manually adjust one of the mis-positioned files and rerun the auto-tailoring tool with the manually adjusted file included as a reference.
Percentile gating
In some analyses, you may need to position a gate vertex at a specific percentile value. For example, in an intracellular cytokine assay, maybe you want to set an IL-4-positive gate at the 99th percentile of the control sample’s staining intensity. CellEngine makes this easy to do.
Howto
- Draw the gate at the approximate position. The most common gate types for this are rectangles, quadrants, splits and ranges, but you can use anything except ellipses.
- Enable per-file tailoring for the gate by checking the box in the left panel under Selected Gate.
- Right-click on the gate vertex that should be positioned at a percentile.
- Click Move to percentile. The percentile tailoring dialog will open.
- Select the files for which to tailor the gate.
- Select the annotation(s) that define tailoring groups, and the annotation(s) that define the control samples within each group. For example, if you have biological replicates and want to position the gate based on each donor’s unstimulated condition, you could select Tailor by: donor and Controls match: condition: unstimulated.
- Enter the percentile at which to place the gate.
- Click tailor gates. The gates will be tailored and the dialog will close.
If multiple files within each group match the control annotation(s), the arithmetic mean of their values will be used.
Proper Gate-Placement Controls
Some flow cytometry controls should not be used to place gates:
- Isotype controls only address background due to non-specific antibody binding, not spillover, and furthermore are not accurate for all clones and conjugates of a given isotype. Clones with different specificity and conjugates with different fluorophore:antibody ratios will have different background.
- Isoclone controls (staining in the presence of an excess of the same clone, but unlabeled) address the specificity issue of isotype controls, but do not control for spillover.
- Fluorescence-minus-one (FMO) controls only address fluorescence spillover. Also use caution with fluorescence-minus-x (FMX) controls: they only address spillover from the included reagents, so there can be no spillover between any of the omitted reagents.
Thus, these types of controls are generally limited in their usefulness compared to biological controls, such as an unstimulated condition or pre-dose timepoint.
For more information, see Maecker, H.T. and Trotter, J. Flow cytometry controls, instrument setup, and the determination of positivity at https://onlinelibrary.wiley.com/doi/10.1002/cyto.a.20333.
Analyzing tailored gate positions
It can be helpful to see which files have the same gate geometry for a tailored gate, especially if you are trying to tailor by a specific characteristic (i.e. making sure all files from a donor share gate positions).
To view which gate geometries are shared:
Howto
- Under Tools, click on Analyze gate tailoring.
- Optionally, select which gates are shown by clicking on the
 icon.
icon.
The position of a tailored gate will be indicated for each sample. A "G" will be used if the gate has not moved since tailoring was turned on. An integer indicates a change from the global position. Any two files that share the same integer have the same gate geometry.
By default, only tailored gates will be shown when opening the tool for the first time. If a non-tailored gate is displayed, a dot will be used for all samples.
For further analysis, you can download the information by clicking download or view a specific gate on a specific file by clicking on a value in the grid.
Changing a gate from tailored to global
When you turn off tailored per file mode for a gate, the gate geometry that is currently displayed will become the global gate that is used for all files.
Resetting a tailored gate for a file
You can reset a file to use the global gate instead of its tailored gate.
Howto
- Select the FCS file for which you wish to reset the gate.
- Select the gate that you wish to reset.
- Click the reset tailored gate for file button.
Copying and Pasting Gates
You can copy gates to different parts of the gating hierarchy using the population hierarchy menu.
Howto
- In the population hierarchy, right-click or click on the three vertical dots next to the population that you want to copy, and select copy.
- Right-click or click on the three vertical dots next to the the population where you want to paste, and select one of the paste options. See below for a description of these options.
| Mode | Result |
|---|---|
| Paste with children | Pastes the population with its children. |
| Paste without children | Pastes only the copied population, without its children. |
| Paste children | Pastes only the children of the copied population, without the copied population itself. |
| Paste … (linked) | These options copy the population(s) as above, but the new populations are kept synced with the copied populations. Modifying either the original or the copied gate will modify the other as well. |
| Paste gate geometry | Pastes the gate geometry (shape) from the copied gate. This modifies the selected gate so that it has the same shape and position as the copied gate. It does not create a new population. The source (copied) and target (paste-to) gate must be the same type (e.g. both polygons). If the target gate is tailored, the change is applied to the current file only. |
Copying and pasting gates preserves tailoring. That is, if your copied gate is tailored, those file-specific tailored gates will be pasted.
Tip
- Paste gate geometry and paste … linked can be useful when you have signaling, cytokine or subsetting gates that you want to have the same shape and position below multiple parent gates. For example, you might want a Granzyme B+ gate to have the same position below both CD4+ T cells and CD8+ T cells.
- You can paste geometry to multiple gates at once by ctrl-clicking multiple populations before selecting paste gate geometry.
Importing Gates
You can easily import gates from another experiment. This allows an experiment to be used as a template in future analyses with the same or similar panel.
Modifying Gates
Converting rectangle gates to polygon gates
If you drew a rectangle gate and you later want to change its shape, you can convert it to a polygon gate.
Howto
- In the population hierarchy, click on the three vertical dots next to the gate that you want to convert.
- Click Convert to polygon.
Adding and removing polygon points
To add a point to a polygon gate:
Howto
- With the gate selected, click on the three vertical dots next to the gate’s name in the population hierarchy.
- Click Add polygon point.
- Use your mouse to position the new point.
To remove a point from a polygon gate:
Howto
- Select the point that you want to delete. There should only be one point with an orange handle.
- Hit delete on your keyboard.
Copying and pasting vertex positions
The x position, y position, or both the x and y positions of a gate vertex can be copied to another gate. This can be especially useful when setting up gates that should be perfectly adjacent to each other.
Howto
- Right click on a point, and select Copy vertex position.
- Right click on the point you wish to move, and choose the appropriate Move to option.
Skewing a quadrant gate
To skew a quadrant gate:
Howto
- Right-click on the gate name in the gating hierarchy.
- Select Enable skewing. If the gate is tailored, choose between Enable skewing (all files) or Enable skewing (this file only).
- Click and drag any of the nodes to a new position.
To disable skewing:
Howto
- Right-click on the gate name.
- Select Make orthogonal. For tailored gates, choose between Make orthogonal (all files) or Make orthogonal (this file only).
Boolean Gating
CellEngine supports creating populations using “not,” “or” and “and” logical operators.
Howto
- To create an “and” or “or” population, or to create a “not” population using more than one gate (“not any”/“nor”), ctrl-click to select the desired gates in the hierarchy.
- Right-click on a population or click on the three vertical dots next to a populations’s name in the hierarchy.
- Click Create “not” population, Create “or” population or Create “and” population.
Note that the CellEngine API supports complex populations constructed with any combination of and, or, not and xor operators. Only a subset of these populations can be displayed in the Web interface.
Combination Populations
CellEngine can automatically create combinations of gates, ideal for analyzing cytokine expression. For example, if you have populations named “IL-2+” and “IFNa+,” creating combination populations from those will create four new populations: “IL-2+ IFNa+”, “IL-2+ IFNa-”, “IL-2- IFNa+” and “IL-2- IFNa-.”
Howto
- Select between one and 12 gates by ctrl-clicking or shift-clicking them in the hierarchy.
- Right-click and select create combination populations.
Locking Gate Positions
CellEngine provides two kinds of gate locking that prevent changes to gate positions. Locking can be useful for preventing accidental changes in long-duration experiments that you analyze over the course of multiple days, and in workflows with quality assurance steps.
Locking a specific gate for all FCS files
In the left panel on the gating page, checking the Lock Gate checkbox will lock the selected gate’s position for all files in the experiment.
Locking all gates for a specific FCS file
On the annotation page, checking the checkboxes in the Gates Locked column will lock all gates for the selected FCS files. When a file’s gates are locked, these actions are disabled:
- Modifying a tailored gate when viewing an FCS file with locked gates
- Modifying a global gate when viewing any FCS file
- The reset to global gate button when viewing an FCS file with locked gates
- Applying tailoring to an FCS file with locked gates
- Disabling tailored per-file mode when viewing any FCS file
See Also
- Note about changing scales after gating in Adjusting Scales
- Keyboard shortcuts