Compensation
Compensation adjusts for spectral overlap in your fluorescence data.
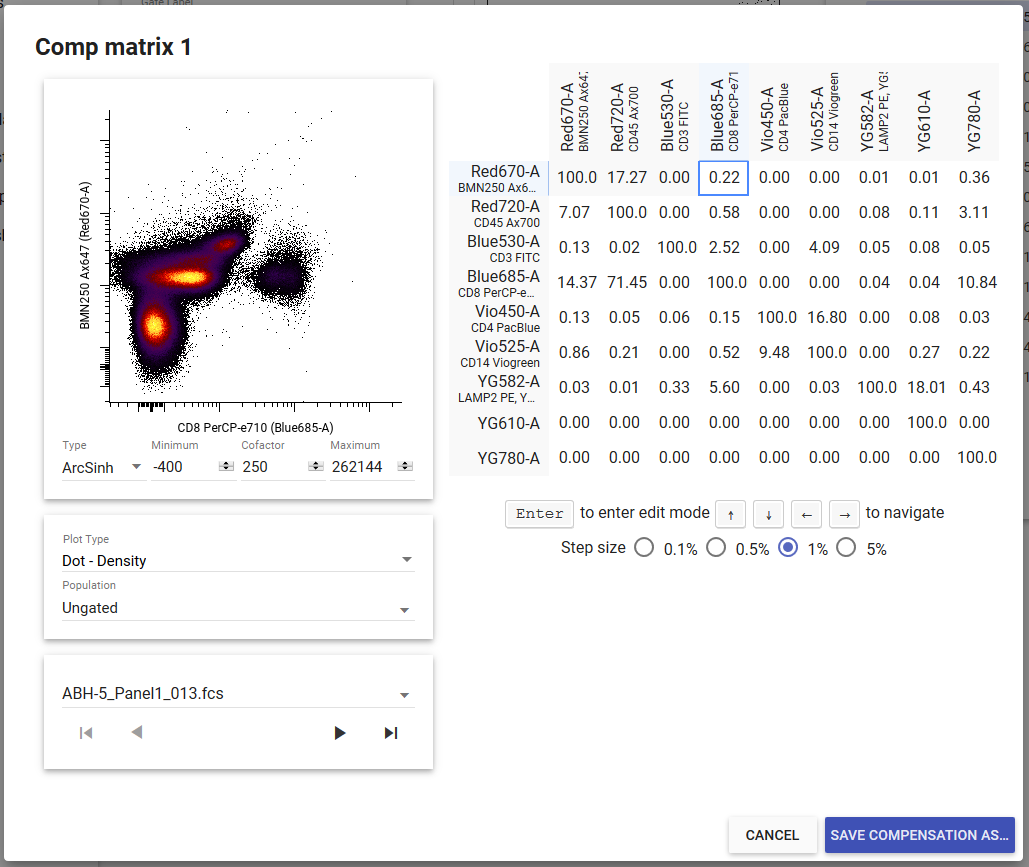
To create a new compensation matrix or adjust an existing one, click the edit button next to the compensation matrix’s name in the gating page to open the compensation editor. You can use your keyboard to adjust compensation values up or down by the increment selected below the matrix. The compensation editor also allows you to adjust your scale settings.
Per-File Compensation
Warning
This is an advanced feature that, if used inappropriately, will bias your data.
By default, CellEngine applies the same compensation matrix to all FCS files in your experiment. In some cases, you may need to use a different compensation matrix for specific files in the same experiment. For example, if you are running a long-term study and are acquiring data over the course of multiple days, you might have a different compensation on each day due to differences in tandem dye behavior or cytometer performance. You can use per-file compensation in these scenarios.
Howto
- Click annotate in the sidebar.
- Toggle the per-file compensations option in the toolbar. A new column will appear that lets you select the compensation to use for each file.
- Set your experiment to use per-file compensation from the gating, export populations, export statistics and/or illustration pages.
Tip
You can use copy/paste keyboard shortcuts to apply a compensation matrix to multiple files at once.
Importing Compensations
Compensation matrices can be imported from TSV, CSV and MTX files exported from CellEngine and FlowJo.
Howto
- From the gating page, click edit next to the compensation selector. The compensation editor will open.
- In the dotted region in the lower-left corner of the editor, paste a spreadsheet, drag-and-drop a file, or double-click to browse for a file to import.