Experiments
Experiments are the primary container for your analysis. They contain your FCS files, attachments, annotations, gates, illustrations and all other analysis information.
FAQ: I’m running a large or multi-day study. Should I split my samples across multiple experiments?
CellEngine can analyze experiments with tens of thousands of files. You should put files that you want to compare into the same experiment. You can upload and analyze files as they are acquired over the course of days, months, or years.
Creating a New Experiment
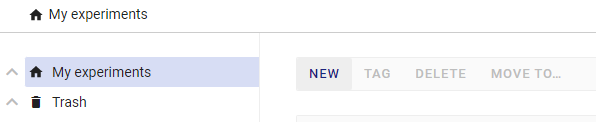
Experiment Creation
-
Choose New from the toolbar above the experiment list. The experiment will be created in the folder you’re looking at.
-
The new experiment’s summary page will be displayed with the name field automatically selected. Type a name for the new experiment.
- Optional: add tags and comments.
- Upload FCS files or import them from other experiments.
- Add any additional files by dragging and dropping into the browser window.
Navigation Bar
The navigation bar is located near the top of every page.

It displays the path to the folder, experiment or illustration you’re working on. You can click on any part of the path to move there.
The navigation bar can also be used to rename parts of your experiment. To rename part of the path:
Howto
- Click on your current path to rename the folder, experiment, or illustration you’re currently working on, or double-click on any other part of the path to select its name.
- Type in the new name.
Experiment Revisions
Experiment revisions are complete snapshots of an entire experiment, including gates, compensation matrices, annotations and illustrations. They cannot be modified or deleted. Revisions are ideal for creating an “undo point” after completing a substantial amount of analysis. Revisions can also be electronically signed, which makes them ideal for use in regulated workflows.
To create a new revision, click save revision on the experiment summary page. To view a revision, click on the row in the revisions table.
For more information and use in 21 CFR 11-compliant workflows, see 21 CFR 11 Compliance.
Retention Policies
You can set a Retention Policy on an experiment to govern how long the experiment must be retained before it can be deleted. Keep the following in mind:
- Once you create a Retention Policy, it cannot be deleted.
- Retention Policies can be extended.
- Retention Policies only block deletion of experiments and folders; they do not prevent you from adding new experiments to a folder, nor from modifying existing experiments. To create permanent records, Retention Policies can be used in conjunction with Experiment Revisions, which are immutable, permanent snapshots of experiments.
Creating a Retention Policy
Howto
- Click the add retention policy button located on the experiment summary page.
- In the dialog that opens, enter a duration for the policy.
- Click apply.
Retention Policies may be extended by the same procedure.